
Lips drawing is an ancient art and it involves creating beautiful drawings of the lips that are usually drawn to depict the facial expressions. It is one of the most popular among the other drawing techniques used by many artists. Some of the famous artists like Peter Lejong, Rembrandt, gas, Rubens, Elton John has illustrated this art in various ways. The lips are considered as one of the most attractive features of a person and artists have given more time and effort to draw perfect lips that are appealing to the eyes of the viewers. There are different techniques that are applied while practicing this art and the drawing tips are discussed below to enhance your skill in this field.
You must start off with learning the technique of straightening the eyebrows. This is an easy thing to do and you will not face any difficulty in doing so. When you learn to do so you will be able to apply it right on the lips. When you are done with straightening the eyebrows, you can go ahead and create the arch with the help of a soft pencil. Make sure you erase all of the unwanted parts of the sketch when you are done with it.
Step three is the creation of the first arch for your lips drawing. You can start off with a small square of white cloth. Paint a straight curving line across the upper and lower lip. This straight line will help you get a better idea of how your lips will look once you are done with it. In order to make it look more natural you can add more wrinkles to the upper lip.
Step four is the next task that is involved in learning the art of drawing lips. To begin with you have to trace a line inside the mouth at the bottom and outside curve of the lips. You can start off with the small triangle shaped area and when you are done with it, draw a vertical line down to the bottom corner of the mouth. The same thing should be done for the lower lip.
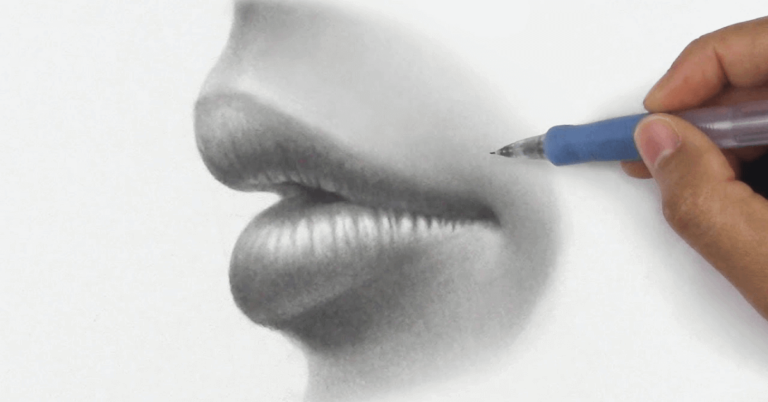
Step five is the right coloring. Remember that the bottom and outside curve of the mouth are going to stay the same. So don’t change them. It is best that you start off with just a few shades lighter than what is on the top of the lips. After the coloring has dried out you can use a highlighter to highlight the shape of the lips.
Step six is the last step for the lips drawing. Trace a line inside the mouth along the upper lip and the bottom of the bottom teeth. You will now want to draw two horizontal lines on either side. Use a highlighter to get a nice bold color on both of the lines. Now use some light translucent marker pens to fill in the gaps between the lines.
You may have to experiment a little bit if you want your lips to look more realistic. I’ve seen people who had perfect lips yet, they weren’t very realistic when they were drawn. Experiment with different strokes and motions. If you are having trouble with making your drawing look realistic, tree drawing with black ink. This way you get better results.
Finally, you are done with the steps for the lips drawing. You are now ready to match up your lip color with the bottom lip color in the top of the previous step. You need to make sure that you are matching up the bottom lip color with the color on your upper lip. If you want it to look more natural, you may even want to apply some lipstick to your lips to make it look like you have something on your lips. Make sure that you do this step correctly otherwise you will find that your lips won’t look as good as they did on the paper.
[…] Also Read: 6 Steps to Drawing Lips […]
[…] Also Read: 6 Steps of Lips Drawing […]