
A lion king drawing can be really impressive and inspiring for a drawing that shows a true representation of this king of the beast. There are a variety of ways to draw a lion King. It is not as hard as you may think it is. All you need is a good imagination, an artistic eye, and a willingness to put in time and effort to be able to learn how to draw a lion face correctly. With just these three things, you can begin learning how to draw a lion king drawing.
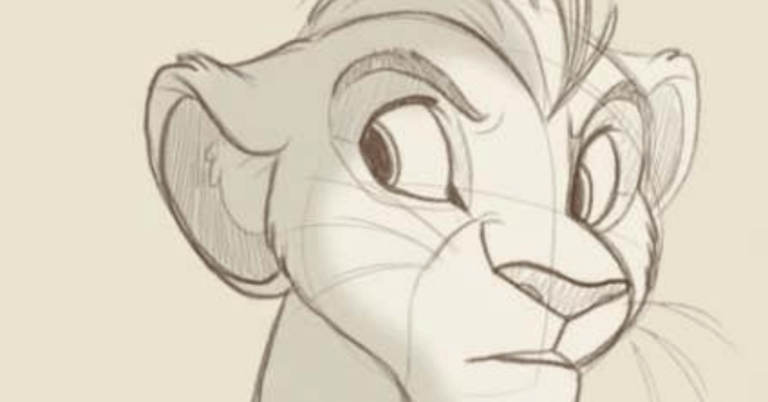
One way to begin the process of learning how to draw a lion drawing is by starting off with the head or headpiece. The best place to start would be the mane or tail. The lion’s head is typically the most beautiful part of this animal’s body. The drawing of the head shows the entirety of the face in its most natural state. The oval-shaped oval is a common shape used in lion head drawings.
The next step in learning how to draw a lion king drawing is to study the stripes along the sides of his mane and tail. These stripes represent his heat or activity. Also notice that he has two large ears and a small nose. Notice that there are a number of dark spots inside of his mouth, which are actually his teeth.
When you have learned how to draw lion drawings, the next step would be to focus on some of the more simple shapes. You will quickly notice that these simple shapes are used the most in lion drawings. Start out by looking at the basic lion head and doing the same for the rest of the body. Then continue on to the remaining parts of the body.
The last step in learning how to draw a lion from the king drawing – step four, is to start sketching the various different actions that the lion does. Keep in mind that he goes around his house looking for food and potential mates. He also looks to watch other animals and snakes. Look for those curved lines in the sketches that represent the various actions that he may take. You can do this by drawing the legs, the upper body and the tail. When you have finished this, it’s time to look at the other features of his body and determine where he needs to go.
The fifth step in the tutorial on how to draw Simba from lion king is to learn about perspective. If you have a large picture to work with, make sure that you’re working from a high and wide area. This way, the effects that you apply to the subject will be more noticeable. Also make sure that your drawing is not too small or too large. A good rule of thumb is to draw the subject at a size that is one-third as large as the largest object in the drawing.
The final step in the tutorial on how to draw Simba from lion cubs is to learn a few tricks of the trade. For example, don’t be afraid to make the eyes pop out a bit. Start with some simple shading and then add more detail as you get more comfortable with the techniques. You can learn a lot about drawing both humans and animals by looking at the tutorials on drawing lions and other big cats. The best part is you’ll have the chance to practice your techniques on other people who are better than you at drawing cats.
So now that you know how to draw lion king Simba you’re ready to start practicing. The best place to start is probably the internet. There you can find tutorials on how to draw every animal you could possibly imagine. In addition you can find websites that offer drawing competitions for aspiring artists. Check them out and you just might win a prize!
[…] Also Read: How to Draw a Lion King […]